In this article, we’ll learn the Dependency Inversion Principle in C# with code examples. We will explore its significance, benefits, and implementation using real-world examples.
Table of Contents
- 1 What is the Dependency Inversion Principle?
- 2 How to Apply Dependency Inversion Principle in C#
- 3 Dependency Inversion Principle in C# Example
- 4 Example: Notification System after applying DIP
- 5 What are the different types of dependency injection?
- 6 FAQs – DIP in C#
- 6.1 Q1. What is the Dependency Inversion Principle (DIP) in C#?
- 6.2 Q2. How do you implement DIP in C#?
- 6.3 Q3. Can you provide a real-world example of DIP in C#?
- 6.4 Q4. Are there other principles related to DIP in C# development?
- 6.5 Q5. Can you recommend any tools or libraries to help implement DIP in C# projects?
- 6.6 Q6. What are the benefits of using DIP in C#?
- 6.7 Related
What is the Dependency Inversion Principle?
The Dependency Inversion Principle is one of the five SOLID principles of object-oriented design, first introduced by Robert C. Martin.
- Single Responsibility Principle (SRP)
- Open-closed Principle (OCP)
- Liskov substitution Principle (LSP)
- Interface Segregation Principle (ISP)
- Dependency Inversion Principle (DIP)
The Dependency Inversion Principle (DIP) states that high-level modules (Classes) should not depend on low-level modules (Classes), but both should depend on abstractions (Interfaces or abstract classes). Additionally, abstractions should not depend on details, but details should depend on abstractions.
This might sound a bit conceptual at first, so let’s break it down with a relatable analogy:
Let’s imagine you are building a house. The high-level module would be the house itself, while the low-level modules would be the bricks, cement, wood, and other construction materials.
The Dependency Inversion Principle (DIP) is like having a good plan or thought for your house before you start building the house. Instead of the house depending on specific bricks, cement, or wood types, both the house and the materials depend on the detailed plan, design, or blueprint (abstraction).
Understanding Low level and High level Modules
When discussing the Dependency Inversion Principle, knowing the difference between high-level and low-level modules is essential.
- Low-level modules deal with specific implementation details and concrete components, like database connections, external services, or APIs. They have the implementation logic to handle specific tasks and have the how-to-do-it detail. Therefore, high-level modules incorporate them inside themselves to make something more significant. Low-level modules are like small building blocks with detailed instructions.
- High-level modules encapsulate the core logic or functionality of the application without getting into implementation details. They have advanced logic that brings together different low-level modules. High-level modules focus on what to do, and low-level modules help them do it.
How to Apply Dependency Inversion Principle in C#
Dependency Inversion is achieved through a technique called Dependency Injection. To grasp this, it’s essential to understand what dependencies are.
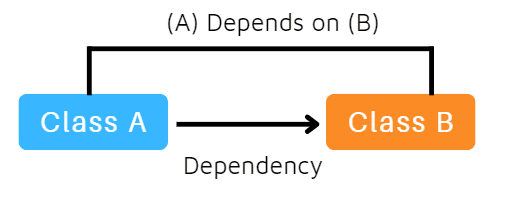
In simple terms, if one class, let’s say A, relies on another class, say B, then B becomes a dependency of A. Dependency injection is about passing this dependency from an external source rather than creating it within the high-level class.
So, Dependency Injection is the practice of providing one object to another that needs it instead of having the first object create the required object by itself.
Dependency Inversion Principle in C# Example
Let’s use a notification system example to better understand the Dependency Inversion Principle in C#. We’ll start by creating a piece of code with and without incorporating the DIP.
Example: Notification System (Without DIP)
In this example, we’ll create a simple notification system that sends messages through different channels: email and SMS.
In this scenario, we’ll see how the code might look before applying the Dependency Inversion Principle (DIP).
Step 1: Direct Dependencies (low-level modules)
// Concrete Email Notification
public class EmailNotification
{
    public void SendEmail(string message)
    {
        Console.WriteLine($"Sending email notification: {message}");
    }
}

// Concrete SMS Notification
public class SmsNotification
{
    public void SendSms(string message)
    {
        Console.WriteLine($"Sending SMS notification: {message}");
    }
}
Step 2: High-Level Module with Direct Dependencies
In a non-DIP scenario, the high-level modules (Example: NotificationManager) directly depend on low-level modules (EmailNotification and SmsNotification), creating tight coupling.
public class NotificationManager
{
    private EmailNotification _emailNotification;
    private SmsNotification _smsNotification;

    public NotificationManager()
    {
        _emailNotification = new EmailNotification();
        _smsNotification = new SmsNotification();
    }

    public void SendEmailNotification(string message)
    {
        // Business logic
        _emailNotification.SendEmail(message);
    }

    public void SendSmsNotification(string message)
    {
        // Business logic
        _smsNotification.SendSms(message);
    }
}
Drawbacks without using DIP:
- High Coupling: The
NotificationManagerdirectly creates instances ofEmailNotificationandSmsNotificationusing the new keyword, which leads to tight coupling. This makes it hard to change or extend the Classes without affecting other parts. - Rigidity: Adding a new notification class would require modifying the
NotificationManagerclass, violating the Open/Closed Principle. - Limited Testability: Unit testing becomes challenging due to the direct dependencies. Mocking or substituting for testing purposes becomes complicated.
- Dependency Chain: The
NotificationManagerclass is tied to concrete implementations, making it harder to manage and upgrade the components.
Example: Notification System after applying DIP
In this scenario, we’ll see how the code might look after applying the Dependency Inversion Principle (DIP).
Step 1: Define Abstractions (Interfaces)
// Abstraction for Notification
public interface INotificationService
{
    void SendNotification(string message);
}

// Concrete implementation of email notifications
public class EmailNotification : INotificationService
{
    public void SendNotification(string message)
    {
        Console.WriteLine($"Sending email notification: {message}");
    }
}

// Concrete implementation of SMS notifications
public class SmsNotification : INotificationService
{
    public void SendNotification(string message)
    {
        Console.WriteLine($"Sending SMS notification: {message}");
    }
}
Step 2: High-Level Module
public class NotificationManager
{
    private INotificationService _notificationService;

     // Constructor injection of the abstraction
    // Here, dependencies are injecting from external source rather than creating them by
   // the high-level class (NotificationManager).
    public NotificationManager(INotificationService notificationService)
    {
        _notificationService = notificationService;
    }

    public void SendNotification(string message)
    {
        // Business logic: Utilize the abstraction
        _notificationService.SendNotification(message);
    }
}
Step 3: Putting it All Together
class Program
{
    static void Main(string[] args)
    {
       // Create instances of concrete implementations

        INotificationService emailService = new EmailNotification();
        INotificationService smsService = new SmsNotification();

        // High-level module depends on abstractions, not concrete implementations
        NotificationManager notificationManagerWithEmail = new NotificationManager(emailService);
       NotificationManager notificationManagerWithSms = new NotificationManager(smsService);


     // Send Email & SMS notifications

        notificationManagerWithEmail.SendNotification("Hello via Email");
        notificationManagerWithSms.SendNotification("Hello via SMS");
    }
}
Benefits of Applying Dependency Inversion Principle (DIP):
- Flexibility: By depending on abstractions, changes in low-level implementations do not directly impact high-level modules. This allows for easier modifications and updates.
- Reduced Coupling: In the initial non-DIP scenario, the
NotificationManagerclass was directly creating instances of concrete notification classes (EmailNotificationandSmsNotification). By using DIP, we inject dependencies through interfaces (INotificationService), reducing coupling between theNotificationManagerand concrete implementations. - Flexibility and Extensibility: With DIP, adding new notification classes without modifying existing code is effortless. Just create a new class that implements
INotificationService, and theNotificationManagercan work with it seamlessly. - Testability: DIP enhances testability. You can easily provide mock implementations of
INotificationServicefor unit testing without having to deal with real email or SMS sending. - Clear Abstractions: DIP encourages clear separation of concerns by focusing on abstractions. This makes the codebase easier to understand and maintain.
- Scalability: Dependency Inversion Principle supports the addition of new functionalities without significant changes to existing code.
What are the different types of dependency injection?
Dependency Injection in .NET Core can be implemented using all three techniques:
- Constructor Injection
- Property Injection
- Method Injection
Here’s a simple example:
Let’s say we want to create a service to greet users.
Step 1: Create an Interface
public interface IGreetingService
{
    string GetGreeting();
}
Step 2: Create a Class Implementing the Interface
public class GreetingService : IGreetingService
{
    public string GetGreeting()
    {
        return "Hello, World!";
    }
}
Step 3: Register the Service with the DI Container
In your Startup.cs or configuration file, configure the dependency injection container. This example uses the built-in .NET Core dependency injection container:
public void ConfigureServices(IServiceCollection services)
{
    services.AddSingleton<IGreetingService, GreetingService>();
   // Other dependency injections can be also added here using AddTransient or AddScoped
  // services.AddTransient<IGreetingService, GreetingService>();
  // services.AddScoped<IGreetingService, GreetingService>();

// Other services and configurations...
}
Step 4: Inject the Service into a Class Using Different Injection Techniques
1. Constructor Injection
Constructor Injection involves injecting dependencies through a class’s constructor. This is one of the most common ways to apply Dependency Inversion in C#. Here is an example:
// Define a class called GreetingController.
public class GreetingController
{
    // Declare a private field to store the IGreetingService dependency.
    private readonly IGreetingService _greetingService;

    // Create a constructor that accepts an IGreetingService instance as a parameter.
    public GreetingController(IGreetingService greetingService)
    {
        // Assign the provided IGreetingService instance to the private field.
        _greetingService = greetingService;
    }

    // Define a method called SayHello.
    public string SayHello()
    {
        // Use the injected _greetingService to obtain a greeting message.
        return _greetingService.GetGreeting();
    }
}
2. Property Injection
Please note that Property Injection makes the GreetingService property publicly accessible for injection, which can be considered less restrictive than Constructor Injection.
// Define a class called GreetingController.
public class GreetingController
{
    // Declare a public property of type IGreetingService to allow property injection.
    public IGreetingService GreetingService { get; set; }

    // Define a method called SayHello.
    public string SayHello()
    {
        // Use the injected GreetingService property to obtain a greeting message.
        return GreetingService.GetGreeting();
    }
}
3. Method Injection
Method Injection involves passing dependencies as parameters to methods where they are needed. It is suitable when you want to inject a dependency only for a specific method:
// Define a class called GreetingController.
public class GreetingController
{
    // Define a method called SayHello that accepts an IGreetingService instance as a parameter.
    public string SayHello(IGreetingService greetingService)
    {
        // Use the injected greetingService parameter to obtain a greeting message.
        return greetingService.GetGreeting();
    }
}
Code Explanation:
- We have a class named
GreetingController. - Inside the class, there is a method called
SayHellothat accepts anIGreetingServiceinstance as a parameter. This is an example of Method Injection, where the dependency (greetingService) is injected into the method when it is called. - Within the
SayHellomethod, we use the injectedgreetingServiceparameter to obtain a greeting message by calling theGetGreetingmethod of the injected service. This approach allows flexibility in providing different implementations ofIGreetingServiceeach time the method is called, making it suitable for scenarios where the dependency may change during the lifetime of the object.
References: MSDN-SOLID Principle in C#
FAQs – DIP in C#
Q1. What is the Dependency Inversion Principle (DIP) in C#?
The Dependency Inversion Principle (DIP) is a fundamental principle of object-oriented design in C# that encourages high-level modules to depend on abstractions rather than low-level details. It promotes flexible and maintainable code by reducing tight coupling between components.
Q2. How do you implement DIP in C#?
To implement DIP, you should:
1. Define abstractions using interfaces or abstract classes.
2. Create concrete implementations of these abstractions for specific functionalities.
3. Have high-level modules depend on abstractions, not concrete implementations.
4. Inject dependencies into high-level modules via constructors or other methods.
Q3. Can you provide a real-world example of DIP in C#?
Sure, consider a logging system where high-level modules depend on an ILogger abstraction. You can switch between different logging implementations, like writing to the console or a file, without changing the high-level code.
Yes, DIP is part of the SOLID principles, including Single Responsibility, Open/Closed, Liskov Substitution, and Interface Segregation principles. These principles collectively guide developers in writing clean and maintainable code.
Q5. Can you recommend any tools or libraries to help implement DIP in C# projects?
While no specific tools or libraries exist exclusively for DIP, popular dependency injection frameworks like ASP.NET Core’s built-in DI container and third-party libraries like Autofac and Ninject can help implement DIP effectively.
Q6. What are the benefits of using DIP in C#?
DIP offers several advantages, including:
Flexibility: Easier to adapt and modify code.
Testability: Simplifies unit testing by allowing mock implementations.
Scalability: Supports the addition of new functionalities with minimal impact on existing code.
Articles you might also like:
- C# Tutorial
- SOLID Design Principles in C#
- C# Liskov Substitution Principle
- Design Patterns
- Singleton Design Pattern in C#: A Beginner’s Guide with Examples

- C# 12 New Features in 2025: What’s New with .NET 8 - April 11, 2025
- Difference Between WCF and Web API with Examples: A Comprehensive Guide - March 27, 2025
- PUT vs PATCH vs POST in REST API: Key Differences Explained With Examples - March 23, 2025